« Previous
Next »
« Previous
Next »
Border and Shading in Word Document
Create Borders
Border can be applied to many different objects in Word; for example, you can add borders to tables, paragraph edges or even whole pages in a document. There are also some automatic formatting keystrokes that will add borders to the cursor position in your document.
Apply borders by the dialog Box
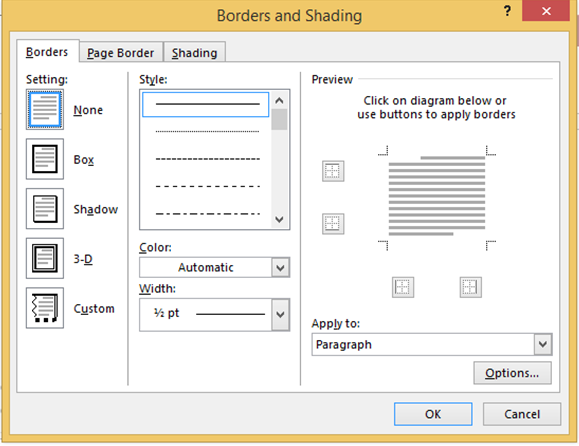
Borders can be added using the borders dialog box available from the borders drop down button. Applying borders in this way gives you more options as to line style, shading and so on.
- Select the paragraph(s) to be bordered
- Click the drop down to the right of the borders button in the paragraph group and select borders and shading the dialog appears as below.
- Click on the Borders tab.
- Choose the required border style
- Select a thickness or colour for the border
- Select an option from the left on where to apply the border OR Use one of the buttons on the left hand side of dialog to apply different borders top, bottom, left or right.
- Click OK to apply borders to selected text

Add Borders To Page:
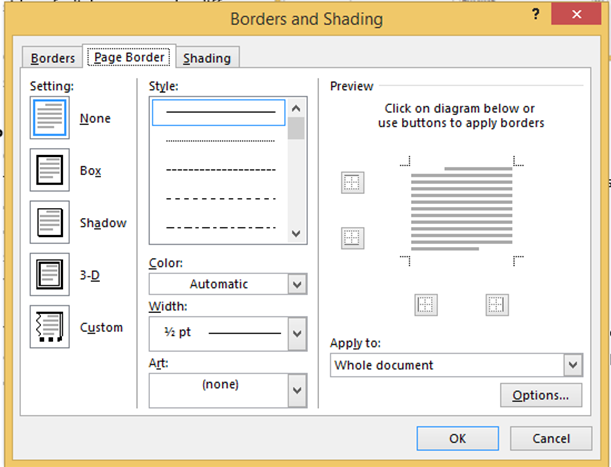
- Click on Page border tab from border and shading dialog box.
- The dialog box will display a list of border settings, styles and options whether this border should be applied to the whole document or just one page or firt page.
- You can use preview section to disable or enable left, right, top or bottom borders of the page follow the given instruction in preview section itself.
- You can customize your border by setting its color, width by using different art available under style section.
- Finally click on OK to apply border with your desired format.

Add Shades to Text:
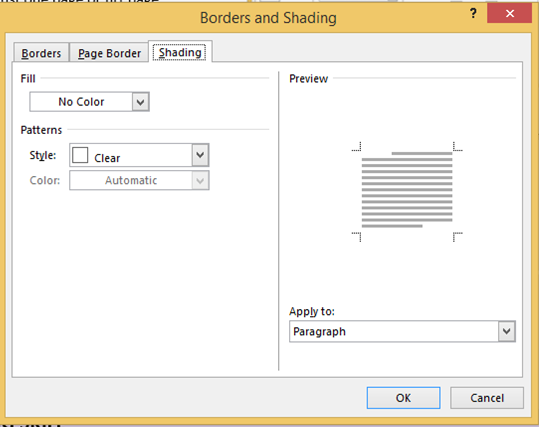
- Click on Shade tab from border and shading dialog box.
- The shading tab will display options to select fill, color and style and it is applied to Paragraph or Text.
- Click on OK to apply.
